Installing Anaconda & Jupyter Notebook in Your Data Science Workbench
Summary
Python is pretty much the go-to data science language—I like it because it is so versatile. We can use it to pipe data from a source to a sink, train predictive models and deploy them in web applications using Python (and a little HTML/CSS in the latter case). The Python packages that we use to do all of these things can also be a little unweildy to manage. One of the packages that makes life a lot easier for data scientists is the Anaconda Distribution. In their words, "The open-source Anaconda Distribution is the easiest way to perform Python/R data science and machine learning on Linux, Windows, and Mac OS X." This enables you to quickly download over 1,500 packages that you can use for Data Science. We'll show you how to do this (in Linux, of course).
Requirements
The following requirements are necessary for successfully completing this tutorial:
- Read & Complete steps in the "Standing Up a Linux Server" Post
- Read & Complete steps in the "Creating a New Non-root Linux User" Post
Learning Objectives
The following learning objectives are intended to describe what elements will be tackled in this tutorial along with how and why we are doing it this way.
- Install a functional version of the Anaconda Distribution within a Linux Ubuntu 18.04 virtual environment
- Utilize Anaconda to install a common Python package
- Execute a simple command line program using this Anaconda package
- Start an instance of Jupyter Notebook using a tunnel to your local machine
- Connect to this instance remotely from a local browser
- Execute a simple script using Jupyter notebook
Implementation
Let's kick this off! You should be logged in to your Virtual Ubuntu instance with the account you created in the resource above as a non-root user with sudo privileges. This is where we are going to start, so we'll begin at the command line in the top level directory of this user account.
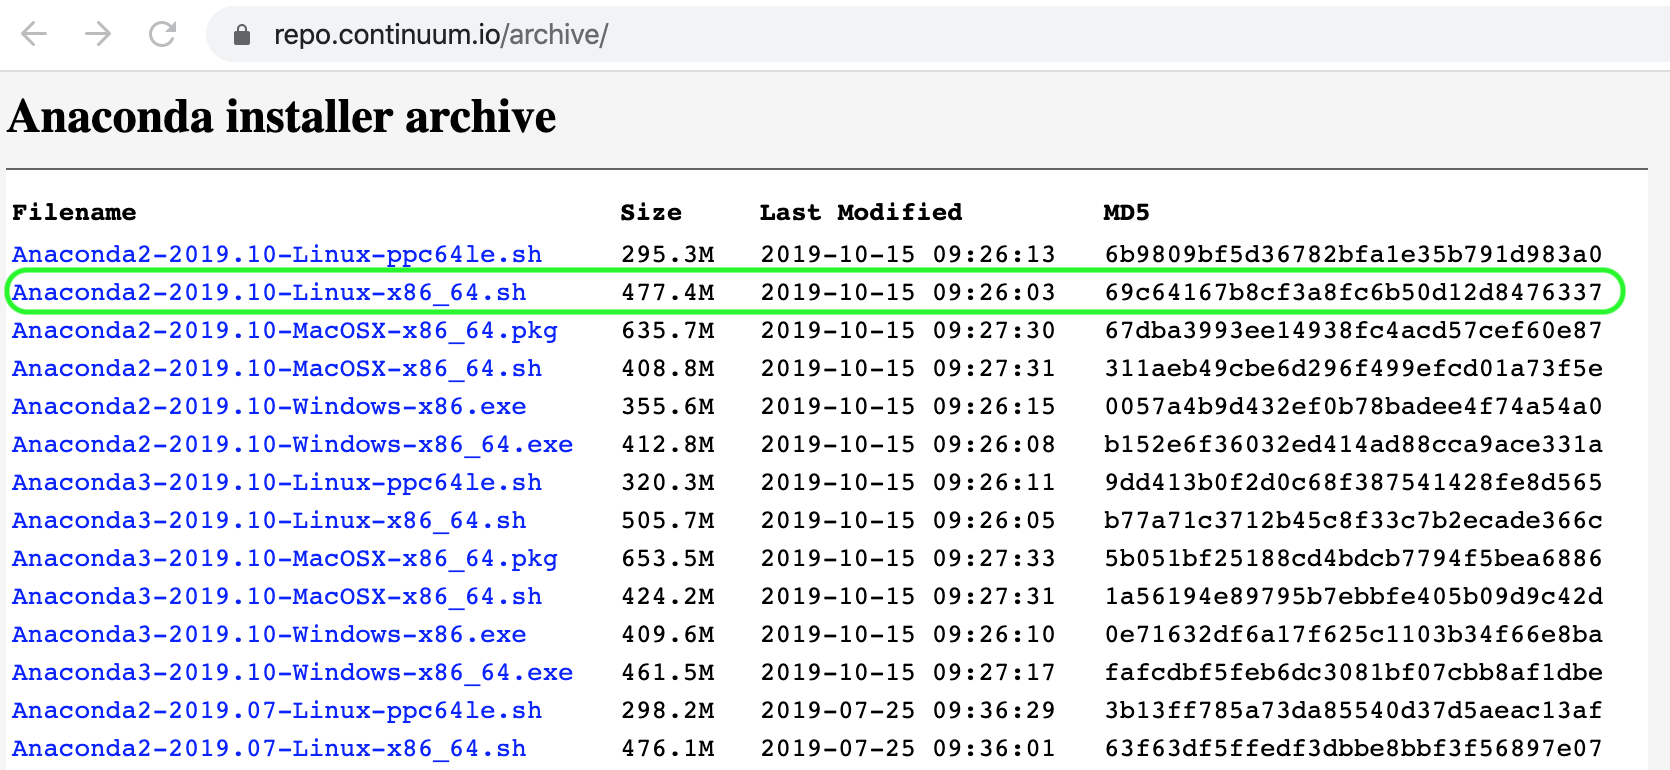
First, visit the following URL in a web browser: https://repo.continuum.io/archive/
You can now see a list of various versions of the Anaconda software including those for Linux distributions (that's us). I am going to use the most up-to-date version for Linux in the "86_64" flavor. You want to right click and copy the link location for this version as indicated below:

Once we have saved this URL to the clipboard we are going to jump back over to our SSH session in the command line and paste this after the `wget` command and execute the subsequent manipulations to get things where we want them to be:
> wget https://repo.continuum.io/archive/Anaconda3-2019.10-Linux-x86_64.sh> bash Anaconda3-2019.10-Linux-x86_64.sh -b -p ~/anaconda> rm Anaconda3-2019.10-Linux-x86_64.sh> echo 'export PATH="~/anaconda/bin:$PATH"' >> ~/.bashrc> conda -V> conda update condaWe now have an instance of Anaconda on our virtual machine. Let's take a moment to validate its existence, install a common Python package using Anaconda (we use the `conda` command to do this below) and execute a simple script to validate the proper installation of the package.
Let's quickly set Python3 as our default instance of Python on this instance of Ubuntu (because if we now just type `Python` into the command line, then it will run Python2 by default):
> echo 'alias python=python3' >> ~/.bashrcBefore we do that we want to utilize a virtual environment so that all of our packages and dependencies can be encpaulated within a partitioned environment:
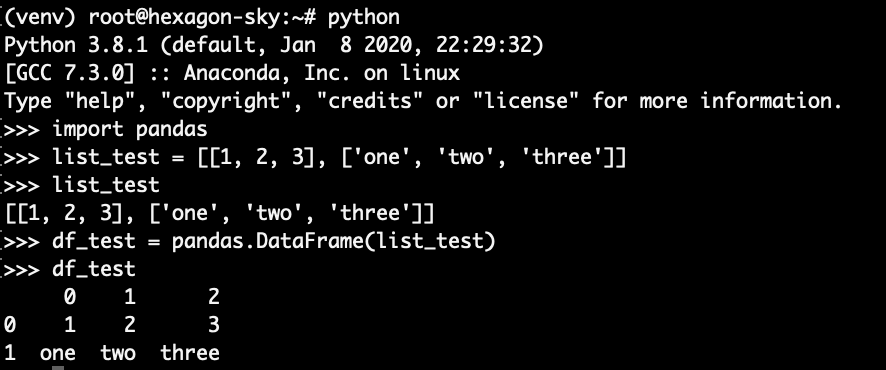
> conda list> conda create --name venv python=3> conda activate venvNow we are in this Python3 virtual environment with no packages installed—let's now install a simple one. We are going to install the Pandas package which is a cornerstone data engineering package that we will be using a lot. Let's then create what we call a data frame in pandas (I typically define this as a variable with `df_` as the root):
> conda install pandas> python>>> import pandas>>> list_test = [[1, 2, 3], ['one', 'two', 'three']]>>> list_test>>> df_test = pandas.DataFrame(list_test)>>> df_test
Now that we have installed a common and useful package utilizing Anaconda, we are going to get to the heart of this post and install the Jupyter notebook package in the same manner:
> conda install jupyterBefore we can jump right in and engage with the notebook we need to create a way to interact with it from our local machine (the one you're on now). Let's kill the SSH session so that we are back on our local machine and reconnect with SSH but calling a few "flags" along the way that enable us to tunnel the traffic through to our browser.
> ssh -L 8080:localhost:8889 root@167.172.134.37> cd ~/> mkdir sandbox> cd sandbox> python3 -m pip install ipykernel> python3 -m ipykernel install --user> jupyter notebook --port 8889 --allow-rootNow we can just let that run in the command line. There should be a URL in the content that is broadcast after initializing the Jupyter instance. Copy that URL to the clipboard. Let's jump over to a browser and visit the following URL to see bring the real interactivity of the Jupyter Notebook alive: http://localhost:8889/?token=b2c7fe1ce3c44e590778b9dc0153db16af5c3813430238e5
Once you visit this URL you should see a User Interface (UI) that looks a little bit like the following:

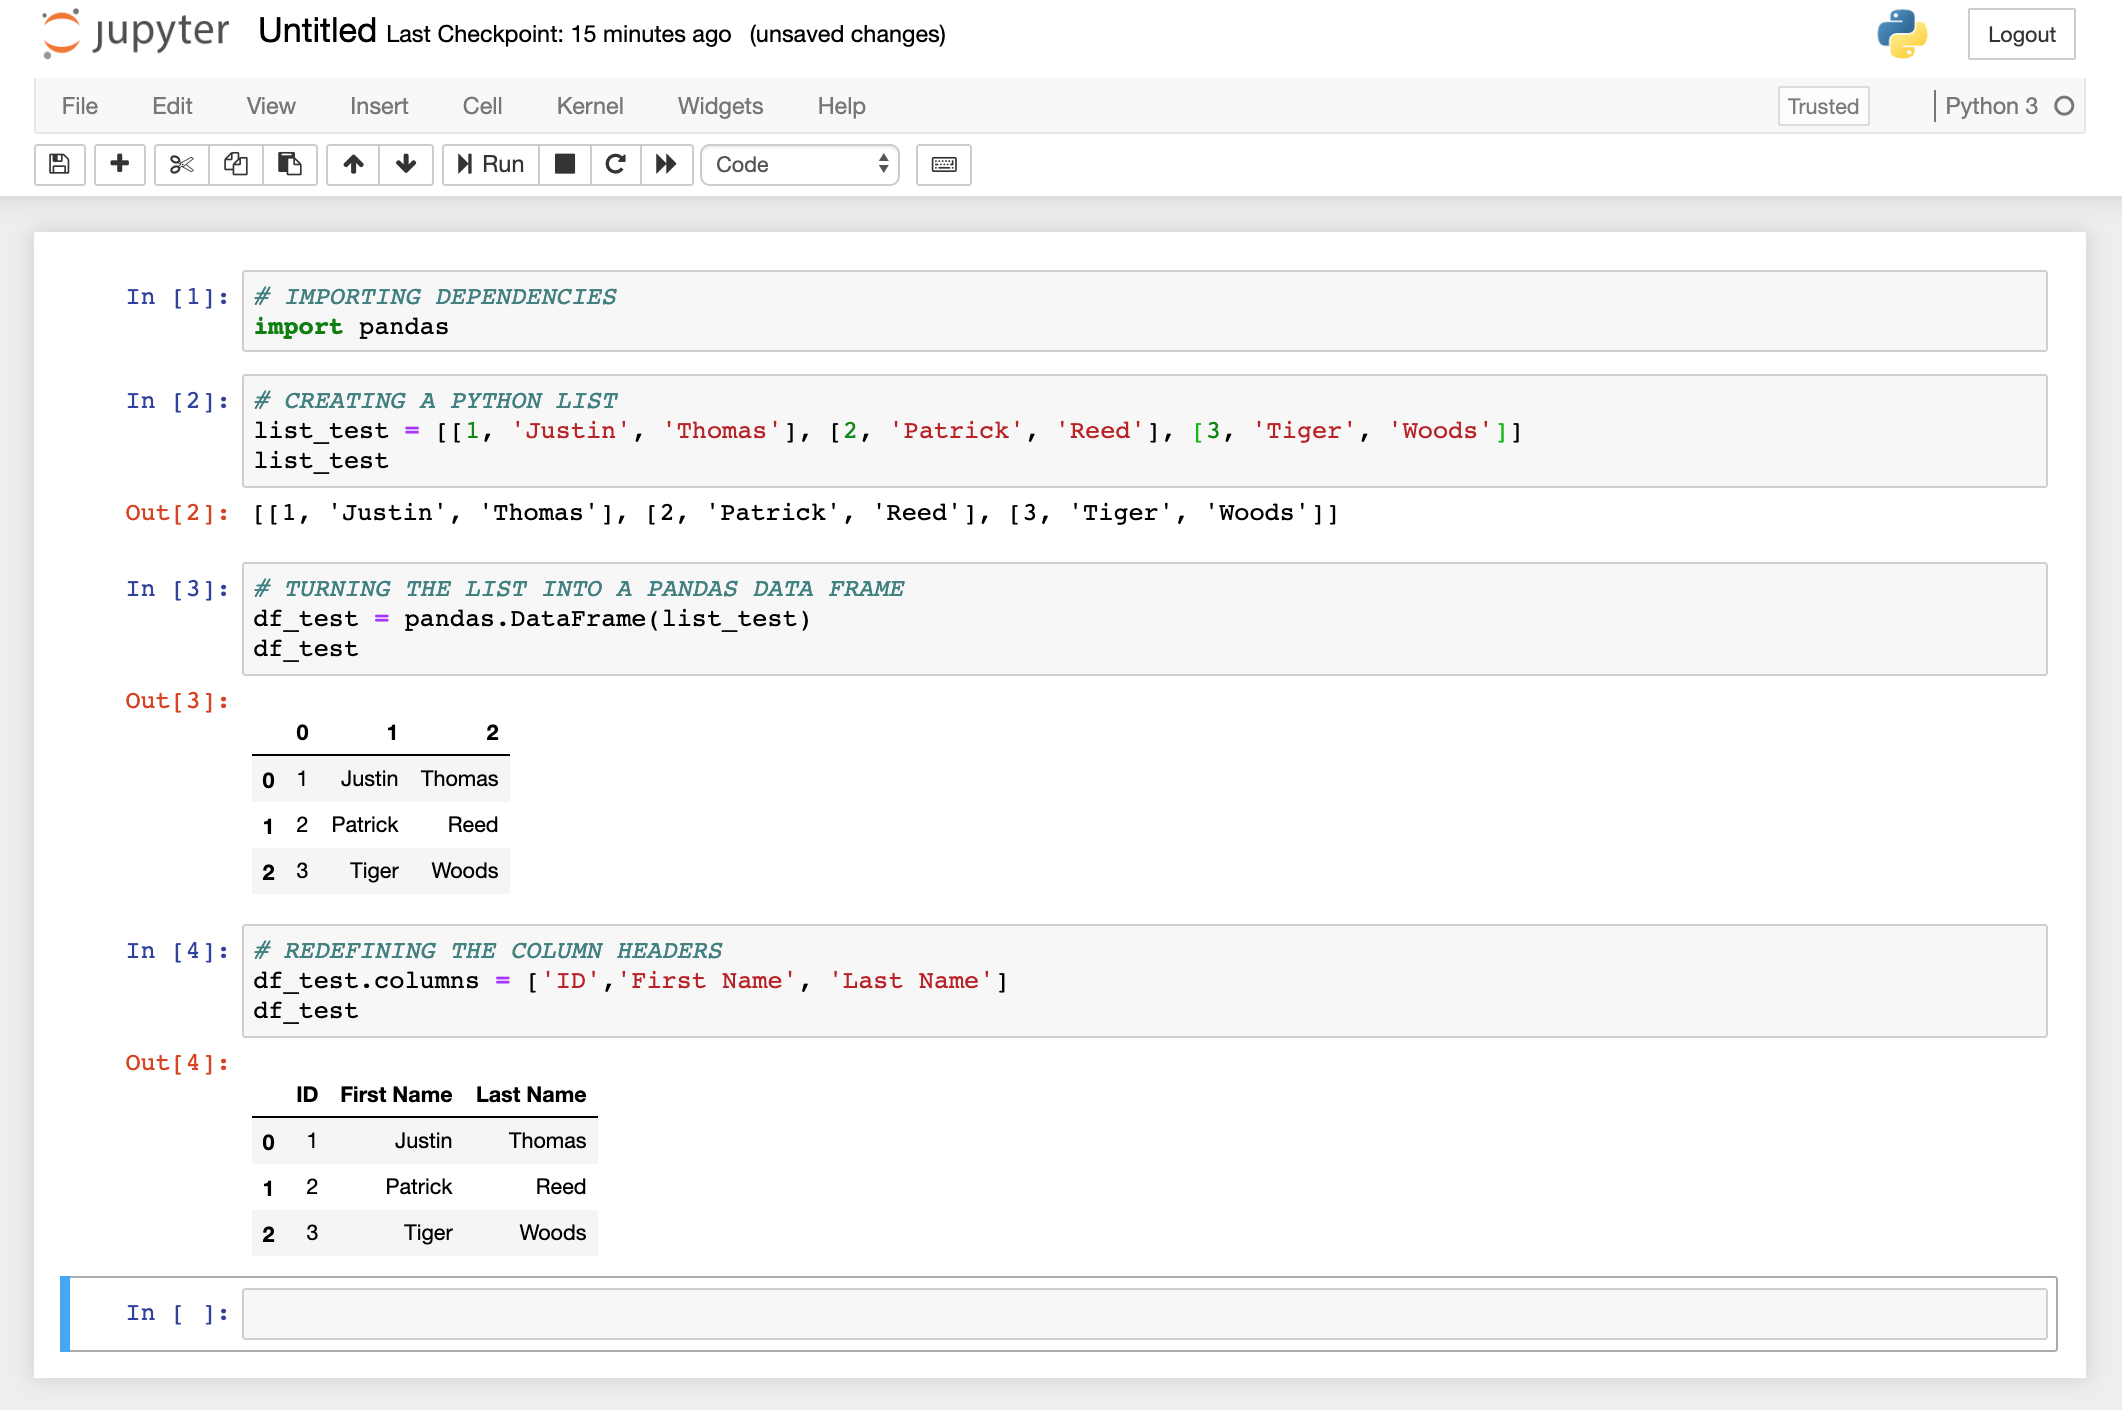
Now that you can interact with the notebook select the "New" dropdown menu in the top right of the view and select "Python 3"—this will create a new file called "Untitled.ipynb" (you can rename that if you want). Click on the file and this will open a new tab with the notebook open. We are going to run the same program as before but in a few Jupyter "cells." Follow along as such:

Congrats! You've instantiated, created and run a notebook using Jupyter!
Now take a few minutes and see what else you can do with this notebook and others. I'd recommend getting used to using both the Pandas and Scikit-Learn packages. I often recommend the Tutorials Point website for first time users as this gives a lot of background and eases into the packages with good examples. Jupyter Notebook will make this much easier than simply using the command line REPL (">>>"). I've included those two resources below.
Scikit-Learn (Tutorials Point)
Have a wonderful time and either leave a comment or send me an email if you have have any questions or encounter any issues.
Cheers, JAH
Please leave any questions or comments that you have—now that the basics are covered regarding the ecosystem and so forth I will begin getting into some business cases.
Yfscgu [url=https://bestadalafil.com/]Cialis[/url] Cpjcty <a href="https://bestadalafil.com/">Cialis</a> Cephalexin Lifelearn Wqkiaa Acheter Cialis A Paris Sans Ordonnance Ruchto https://bestadalafil.com/ - cialis from india cialis 5 mg canadian pharmacy Fthlri